![logo big.png]](https://help.togal.ai/hs-fs/hubfs/logo%20big.png?height=50&name=logo%20big.png)
This article explains how to create new custom materials for your organization's library. Creating custom materials allows you to accurately account for all components in your assemblies, especially those not included in the standard library. To follow these steps, you should already be in the assembly editor.
- From the assembly editor, navigate to the Materials tab in the left-hand panel.

- Click the green plus (+) icon at the top of the panel to open the Create New Material window.
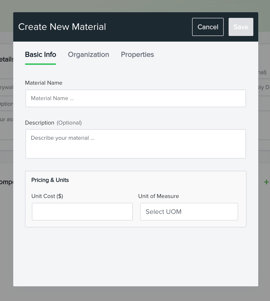
- On the Basic Info tab, enter a Material Name and Unit Cost. You can also add an optional Description and select a Unit of Measure (UOM).
- (Optional) Click the Organization tab to add organization or accounting codes, like a MasterFormat number, or add Custom Fields for internal tracking.
- (Optional) Go to the Properties tab to add specific Physical Properties that help identify or filter the material, or that would be used in a formula, like the material size.
- Click Save to add the new material to your library. It can now be assigned to any assembly component.